A concrete deck is a game-changer for any outdoor living space. Unlike wood, which rots and warps, or pavers that sink and shift, concrete offers durability, low maintenance, and endless design possibilities. Whether you’re drawn to sleek modern aesthetics, rustic textures, or bold colors, a concrete deck can transform your backyard into an extension of your home. This guide walks you through seven proven concrete deck ideas, from minimalist designs to multi-level layouts, plus practical tips for DIY installation and long-term care so your investment lasts decades.
Table of Contents
ToggleKey Takeaways
- Concrete deck ideas offer superior durability and low maintenance compared to wood or pavers, lasting 25–40 years with proper sealing and care.
- Polished minimalist designs, stamped stone patterns, and colored stains are versatile concrete deck finishes that match any aesthetic from modern to rustic.
- Multi-level concrete layouts with proper riser heights (7–8 inches), tread depths (10–11 inches), and code-compliant railings add functional zones and visual interest to outdoor spaces.
- DIY concrete deck installation can save 50% on labor costs when you start with a solid gravel base, proper formwork, and single-pour technique to avoid weak joints.
- Seal your concrete deck every 2–3 years with penetrating sealers and address cracks early to prevent water infiltration and extend the lifespan of your outdoor investment.
Modern Minimalist Concrete Designs
Clean lines, neutral tones, and uncluttered surfaces define the minimalist concrete deck. This style works especially well for contemporary homes and tight outdoor spaces where less truly becomes more.
A polished concrete finish is the signature look here. The surface is ground smooth and sealed, creating a sleek, almost interior-like appearance that reads as intentional, not industrial. Polishing removes the top layer of aggregate, revealing a dense finish that’s easier to keep clean. Sealers protect against staining and water damage, and a matte or satin sealer preserves that understated feel without a glossy sheen.
Minimal designs also pair well with geometric elements: a single border stripe in a contrasting color, a perfectly flush transition to landscape, or subtle changes in elevation to define zones without visual clutter. The restraint is the point. Keep planting minimal, a few specimen plants in containers, not a riot of color, so the deck itself becomes the focal point.
This approach is ideal if you’re after a contemporary vibe and want a deck that reads sophisticated on a budget. Polishing and sealing are labor-intensive but doable for a DIYer willing to rent a concrete grinder and take time with technique.
Stamped Concrete Patterns and Textures
Stamped concrete mimics stone, slate, brick, or wood at a fraction of the cost and with far less maintenance. A decorative overlay is applied to wet concrete, then stamps (metal forms) are pressed into the surface to create pattern and texture. The result looks remarkably authentic up close.
Common patterns include ashlar (random rectangular stone), slate, brick running bond, and wood plank. Colors are mixed into the concrete or applied as powder before stamping, so pattern and hue are integral, not painted on top. This matters for durability, there’s no topcoat to peel or wear away.
One caveat: Step-by-step instructions for pouring and finishing a concrete patio are critical here. Stamped concrete demands precise timing. The concrete must be at exactly the right stage of cure, firm enough to hold an impression but soft enough to compress cleanly. Wait too long, and stamps won’t set. Too early, and you’ll crack the surface. Hiring a pro is reasonable if you’re new to concrete work: otherwise, practice your technique on a test slab first.
Stamped decks hide imperfections better than flat pours, and grout lines (used to enhance the stone effect) actually improve drainage by creating tiny channels. Seal every 2–3 years to keep colors vibrant and prevent water infiltration into the porous concrete.
Stained and Colored Concrete Finishes
Concrete stains come in two types: acid-based and water-based. Acid stains chemically react with the concrete, creating rich, variegated colors that age beautifully. Water-based stains sit on the surface and offer more uniform, vivid hues. Both can be layered for depth and complexity.
Staining works best on mature, clean concrete (new concrete can take 28 days to fully cure and accept stain properly). Test any stain on a small area first, concrete is porous and variable, so color outcome depends on the slab’s pH, moisture content, and aggregate composition. What looks terracotta on one slab may shift toward rust on another.
Powder colorants mixed directly into wet concrete offer the most durability because color runs throughout the slab, not just on the surface. Integral color doesn’t fade from UV exposure or traffic wear. But, powder colorants are chosen before pouring, so planning ahead is essential.
Stained decks feel sophisticated and custom. Pair a warm taupe stain with a polished finish for elegance, or layer multiple stain colors for artistic flair. Western living home design and outdoor entertaining ideas showcase how stained concrete works in contemporary and rustic settings alike. Always seal stained concrete to protect the color and reduce efflorescence (that white, chalky mineral bloom that can dull the finish).
Multi-Level Concrete Deck Layouts
A multi-level deck adds visual interest and defines functional zones, a raised lounge area, a sunken dining platform, steps connecting different heights. Concrete handles elevation changes beautifully and can be far more stable than wood if done right.
Step design matters for safety and usability. Building codes (typically the International Building Code, or IBC, which varies by jurisdiction) require consistent riser heights and tread depths, usually 7 to 8 inches for rise and 10 to 11 inches for tread. Inconsistent steps cause trips and liability issues. Mark and measure carefully during layout. Use temporary wooden frames (formwork) to hold concrete in the correct shape as it cures.
Railing requirements also change with elevation. Any deck more than 30 inches above grade typically needs a railing with 4-inch sphere clearance (meaning you can’t pass a 4-inch ball through balusters) and a 200-pound horizontal force resistance. Again, codes vary by jurisdiction, so check local requirements before pouring.
Multi-level concrete decks are structurally sound but require more complex formwork, rebar placement, and finishing skill than a simple slab. This is a good project to hire a contractor for, or tackle with a knowledgeable DIY partner. The payoff is a unique, durable outdoor room that flows naturally.
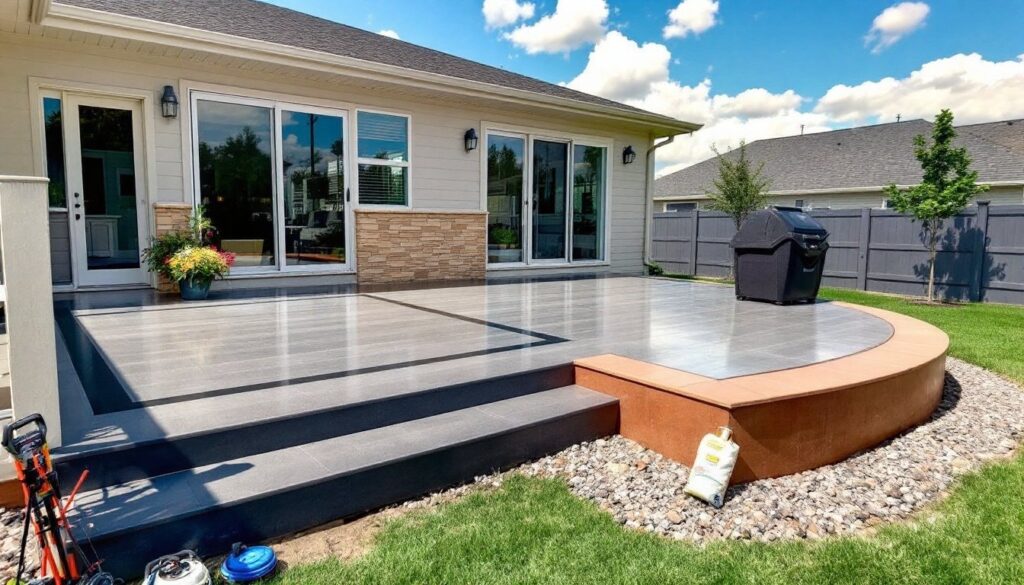
Cost-Effective DIY Installation Tips
A basic concrete deck costs $6 to $12 per square foot for material and labor (regional prices and material grade vary widely). DIY installation cuts labor costs substantially if you’re comfortable with heavy work and detail-oriented execution.
Start by prepping the base. Remove sod, compact soil, and add 4 inches of gravel base, raking it smooth and level. This prevents settling and water pooling under the slab. Next, build formwork, wooden frames that hold concrete in shape while it cures. Use 2×4 lumber staked with rebar or stakes every 4 feet. Check that formwork is level (a 4-foot level and a straight 2×4 are essential tools).
Order ready-mix concrete from a batch plant and have it delivered (usually a 3-cubic-yard minimum). Pour in one session for a uniform slab: partial pours invite weak cold joints. Spread concrete evenly across formwork, then screed it flat using a straight 2×4 dragged across the forms. This removes excess and levels the surface. For a basic broom finish (slip-resistant texture), drag a damp broom across the setting concrete when it firms up, roughly 2 to 4 hours after pouring, depending on weather and concrete mix.
Safety first: Wear work gloves, safety glasses, and a dust mask. Concrete is caustic and can burn skin. Leave formwork in place for at least 24 hours before walking on the slab, and wait 7 days before sealing. Southern home design and porch ideas often feature sealed concrete decks that age gracefully with proper care.
Maintenance and Long-Term Care
Concrete lasts 25 to 40 years or more with basic maintenance, easily outlasting most wood decks. The key is sealing and cleaning.
Seal your concrete deck every 2 to 3 years, depending on climate and foot traffic. A penetrating sealer soaks into the concrete to protect against water, salts, and UV damage. Acrylic sealers are budget-friendly but offer shorter protection (1 to 2 years). Polyurethane or epoxy sealers last longer but cost more and require careful application. Before sealing, clean the deck thoroughly with a pressure washer (use 3000 PSI or less to avoid damaging the surface) and allow it to dry completely.
Address cracks early. Hairline cracks (less than 1/4 inch wide) are cosmetic and don’t compromise the deck. Wider cracks should be filled with concrete repair caulk or epoxy filler to prevent water infiltration. Spalling (surface pitting or peeling) usually results from freeze-thaw cycles and inadequate sealing, reseal promptly to slow progression.
In winter climates, avoid salt-based deicing products, which accelerate deterioration. Use sand, calcium chloride, or magnesium chloride instead. Sweep debris regularly and avoid pooling water, which weakens the seal and invites algae growth. With these habits, your concrete deck will age like fine wine.
Conclusion
A concrete deck offers durability, design flexibility, and true outdoor living space. Whether you go minimalist-polished, stamped-stone, colorful-stained, or multi-level, concrete adapts to your style and budget. Start with honest assessment of your skill level and time commitment. Simple pours and finishes suit DIY work: stamped patterns and complex layouts benefit from professional help. Once down, your deck will serve your family for decades with modest, regular care. Get started this season.